Thursday, May 28, 2009

I'm finally back!!

Wow, it has been a whirl wind couple of weeks around here. But now the kids are out of school for the summer and they are so excited! Me, on the other hand... well, I wouldn't say that I am as excited as they are. I do enjoy the summer, but the older they get, the more the kids bicker. And I hate listening to that! Maybe I should find another summer camp or two to send them to. No, I really do want to spend time with them. They just grow up too fast! We did enjoy our time at the beach. The weather was great after about noon on the second day. So they played in the ocean and the pool, and we ate lots of yummy food, did a little shopping, a lot of relaxing, and even took in a movie. We took them to see Night at the Museum 2. I went in with low expectations, but I ended up really liking it. It was pretty funny. The 3 year old even seemed to find a lot of it funny. After it was over he looked at me and said, "dat big guy keeped telling de udder man hey dum-dum, you bring me gum-gum." and then he just cracked up! It was so precious. I really enjoyed our time away, but sure hated to come back and start all that laundry!! How is that that we came home with more (dirty) clothes than we took?? At least it seems that way. lol Anyway, I'm glad to be back and I have lots and lots of fun stuff to share, so I'll get to that now. Happy??

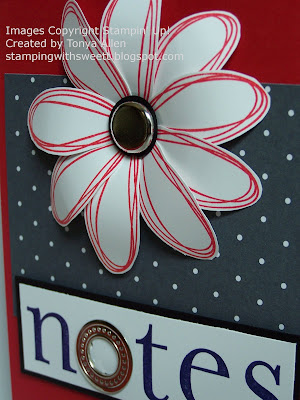
I'll start with the gifts I made for the teachers. Remember the notepad covers I talked about a few posts ago HERE? Well, I made one for each of my DD's 2nd grade teachers. Here is the first one.


Here is the second one:


and after I thought I was finished, I decided it needed a lady bug. So I made one with a few punches and added it to the cover. then I drew on the antennae with a black marker. sorry the picture is blurry.


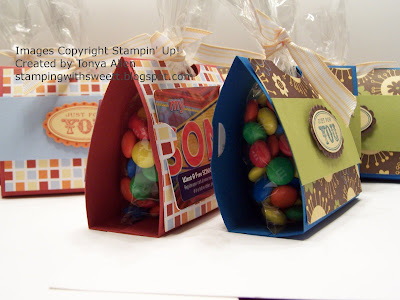
For my DS's 6th grade teachers, I made little gift bags. I based them on the Easter gift bags I made earlier. You can see that post HERE. I had purchased gift cards to Sonic for each of them and then added that to the back using the slit punch. I filled the bags with M&Ms because 1) Who doesn't love chocolate? and 2) I though the colors went very well with the papers I was using. So here they are.

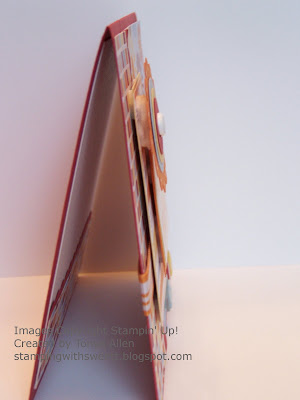
Here you can see the candies on the inside and the gift card on the back.


They were a lot of fun to make and everyone seemed to really appreciate their gifts.

Speaking of gifts... a friend had a little baby shower recently. I wasn't sure what I wanted to get her, so I went off to the store to see what caught my eye. I saw this super cute Lion onesie and decided that was what I would get. I also bought a little rattle to go with it. When I got home, I set out to make a matching card and a gift box to hold it all. Here's what I came up with:
This is the onesie and the matching card. I made the lion with several punches. The card template I found HERE at Lauren Meader's blog. She has some really cute onesie cards. I've seen them made before, but I really liked her basic tutorial. Then I just matched the colors, etc with the onesie I had purchased.

Here's just the card

and here's the box. I put a tiny bit of adhesive on the back of the card and just attached it to the top of the box. Cute Huh??

So there you have it. Hahaha. I hope all of these pictures help make up for not having posted in so long! And ... as always, I would love to hear what you think!! I hope y'all have a Stamptacular Day!!

Monday, May 25, 2009

Happy Memorial Day!

Hey Y'all! My family and I are still enjoying our time at the beach. The weather improved and we have had two days of sun!! We are headed home tomorrow, so I'll be back to post later in the week. Hope all of you are having a wonderful Memorial Day!! Don't forget to remember and honor those who have served or are serving our country so that we may continue to enjoy our freedom!

Have a Stamptacular Day!

Monday, May 18, 2009

Hey Y'all! It's super busy around here this week because it's the last week of school. So I probably won't be posting much this week. But I hope to be back in full swing next week as we kick off the summer!!

Just wanted to let you know that I have now added the link for instructions on how to make the ribbon rose/flower that is on the "green" card below. Thanks for looking!

Have a Stamptacular Day!!


Ok I am back again for a second... I have been asked about the Jr. Legal Pad covers (as seen below). You can find the link HERE. This will take you to the VSN challenge thread on SCS where you can find the template for the covers as well as a whole gallery of samples. The template was created by one of the members of SCS, the fantasctic Julie Ebersole (aka JulieHHR). They are so much fun and very quick to make. I am planning on making some for Teacher Thank You gifts!!

Sunday, May 17, 2009

Back from Vegas, Baby!!

Whew! I am tuckered out! The main event - the May VSN - is over and it was soooooo much fun! There were a total of 15 challenges this weekend. We had 4 Friday night and 11 on Saturday. One challenge per hour!! I've explained it before, but just in case you aren't familiar with VSN, here's a little summary. Splitcoaststampers.com (where I spend a LOT of time) holds these events called VSN(s) which stands for Virtual Stamp Night(s). There are these fantastic women who organize and prepare challenges that get posted on the VSN chat boards. There is a new challenge posted each hour during the event. This time it ran from 7pm-10pm on Friday and Noon-10pm on Saturday. You have 45 minutes to complete each challenge and 15 minutes to clean up your workspace, take a break, etc before the next challenge is posted. Obviously it depends on the honor system to work. You then have until (usually) the following Monday to upload your work. That way, if you have to miss a challenge or twelve, you have until Monday to do them (still following the 45 min. rule) and get them uploaded. If you participate and upload while the challenges are being played, you have a chance to win a prize. I won an adorable stamp set called Build a Bouquet from the company "My Favorite Things". I was sooooo excited!! Woot!! I wasn't able to participate in all of the challenges, so I hope to do the ones I missed today and tomorrow and get them uploaded also. After the upload deadline, all of the challenge hostesses will select their favorites and put them in an honor gallery. There are no prizes for being selected... but it's an honor!! to be selected. So later this week, I'll see if I get selected. I've never been in an honor gallery and think it would be very flattering.

Anyway, I am going to post pictures of all of my projects that I completed yesterday. After I finish the rest of the challenges, I'll be back to share those, too. I'll try to give you a short description of each challenge as I go along. I won't be posting all of the details about each card though, because this post is going to be super long as it is. But if you have questions about something, just leave me a comment and I'll address it.

*It seems that SCS is having some technical difficulties this morning. I'll add links after they get back online.

So here we go.... the first challenge was "Double Down." We were to make two cards (just alike) and they had to be related to Vegas somehow. I hear the golfing in Vegas is great, and I needed a card for Father's Day, so I made these. I love that the challenge made us create two cards, because now I can sent one to my Dad and still have one to keep!! I am forever hoarding my cards because I don't want to give them away with out having a copy. I mean, what if I want to make that card again sometime?? I wouldn't have it here to copy! See .... dilemma! LOL. I always tell my self to go ahead and make two the first time, but I rarely do.

Next was a super fun challenge~ "Non Traditional Wedding Card". We had to think about all of the fun themed, non-traditional weddings Vegas has to offer. And we had to use bright colors, not the pastels or neutral cards so often seen with wedding cards. And here's what I came up with. The "bride" has on a tulle veil and the "groom" has a little black top hat made from cardstock.
This challenge was "Hitting the Tables." We were to use the colors red, black and white only! These colors are a nod to card suites, roulette tables, dice, etc. I LOVE this color combo. It's always a great standby.
This challenge was called "Card Buffet" and was inspired by all of the fantastic food and drinks Vegas has to offer. Our cards were to use food or non alcoholic beverages as inspiration. Yummy!!
This was one of my favorites, because it was inspired by one of my all time favorite TV shows, CSI: Las Vegas. Our hostess talked about crimes and solving them and "being framed" etc. So we were to use "frames" in our projects. We could alter a frame, as I did here, or use a cardstock frame of some kind. I made this frame for my DD's bedroom.


Next, we have a great sketch inspired by slot machines. Our hostess gave up this great sketch and off to work we went!

Next was the "Green is the color of Money" challenge. We were to use all green and one neutral. Even the accessories had to be green. (Things like brads, buttons, ribbon, etc. If you used it, it had to be green.) They are easy to make and look great! Don't you think?

Editing to Add link! You can find the instructions on how to make this pretty ribbon flower HERE. (be sure to look around while you are at Christine's blog. It's fantastic!)
I added two small pieces of ribbon, each folded into a cone shape and then flattened, as the "leaves." I just used glue dots to hold everything in place.


This was for the "Shopping in Vegas" challenge. Our hostess loves to shop while in Vegas and even had to buy an extra suitcase so she could get all of her goodies home. So she listed all sorts of things we had to include in our card (suitcase). I thought this was a really fun challenge. We had to have 5 layers, 3 ink colors, 1 image, 1 sentiment, sponging, ribbon, 3 dew drops or brads, plus something to glam it up (I used glitter on the wings).
Here is the "Glamor" challenge card. Our hostess loves all things glittery and blingy! So we had to glitter up an entire panel. I used iridescent ice embossing powder over the entire white panel. It's hard to see how shimmery it is in this picture. But irl, it is super shimmery and glittery and blingy and what ever other "y" word you can use. lol. I was covered in glitter when I was done.
Another one of my favorite challenges was to cover a Jr Legal pad. We were given an awesome pattern to follow. There is even a pocket on the inside of the cover! My DD wants me to make her one of these now. I have to say, they are super cute! I used the Morning Sunshine DSP because I am thinking about offering this at a stamp camp in June and I can get this paper in bulk. FUN!!


So that's all for today. I finished 10 out of the 15!! Now maybe I can get to work on those last 5. As always, I would love to hear your comments!!! Thanks for dropping by and I hope y'all have a Stamptacular Day!

Friday, May 15, 2009

It's Friday!!! Plus I have my second tutorial!

I love the weekends this time of year. Well, I love them all the time, but the weekends of Spring and Fall are my FAVES! Fall for Football season!! And Spring for yard work. My family and I moved to a new home last summer and so this is the first chance I have had to really do some work in the yard. I wanted to start a little garden this year, but time got away from me. Guess I'll try again next year. I may still get some fall veggies planted. I really, really love homegrown tomatoes and potatoes. And peas. And squash and zucchini. Oh and onions. Ok, there are a ton of things I would love to grow. Actually there are a lot of things I want to do. Like learn to play the guitar. And actually be able to play it, not just do some chords. I would also love to learn how to restore vintage cars, study interior design, and learn to build cabinetry. But for now, I will just stick with paper crafting. So today, as a nod to Spring and yard work, I have my second tutorial. I had a lot of fun making this flower. When I finished with it, I thought about all of the things I wanted to put them on... frames, altered tins, magnets, clothes pins.... the list is endless. But for this one, I chose to put it on a bag. I am thinking of sending it to a friend packed with some fun gardening tools and maybe some flower seeds. That is if I can part with it. Really the flower was fairly quick and easy to make so I can just make a bunch more! I have another idea using this same pattern but with a twist that I hope to get done today. I will share as soon as I get it done. I am equally excited about it and hope it turns out as neat as I picture it in my head.

So - yes, we are finally getting to the tutorial! I told you I usually go on and on ;) - here's the finished bag:


Isn't it cute? And here's how I made it!

You will need:
The Big Shot and the Scallop Circle Die
Scissors (I like SU's paper snips or CutterBee scissors)
Sponge
Pencil and ruler
Buttons (I used SU's corduroy buttons)
Tool kit (for the anywhere eyelet hole punch and hammer)
And of course, Cardstock and ink (I used Summer Sun CS and More Mustard Ink)


Die cut 3 circles. Then line your ruler up across the center of one of the circles in between scallops and draw a pencil mark from edge to edge. My pencil marks are dark here so you can see them, but I suggest making them lighter.

You will continue to make lines across the circle, like a pie, always going between the scallops.
I used a 1/2" circle punch to punch out a piece of scrap cardstock to place in the center of my flower. You will want to draw a circle (or trace the cs circle) in the center for your cutting guide line. On this flower I drew lines between every scallop. But after you have done this once or twice, you should be able to get away with doing maybe every third scallop. All of these pencil marks will be your cutting guide lines. Mark all three circles. Now you start to cut each petal.

As you can see, I have cut all three of my circles into petals. Cut from the edge just to the center circle line we drew earlier. DO NOT cut all the way to the center or you will have a mess of petals. And now it's time to assemble your flower.

Turn the circles over so your pencil marks are on the back. Then use snail or other double sided adhesive and tape the 3 circles together in the center. I just put a small strip of tape inside the small circle we used as a guide line. The flower will be held together by the button, so this is just to make assembly easier. I curled the petals of each circle just using my fingers and then sort of fluffed the petals up. This will give dimension to your flower.

Using the anywhere hole punch, punch a hole in the very center of your flower. Make sure to go through all three layers. (I know some of the stuff I am telling you seems like common sense, but I have found that too much information is better than not enough. at least in the case of tutorials)

Now we sponge!! Sponge the color all around the edges of the flower. This will add another layer of depth. I sponged the center of the flower a bit heavier than the edges. It helps to sort of anchor the button visually.

Now, just add your button, re-fluff the flower and you are done!! Yea! You made it!

Here's a close up of the flower:

I finished my flower off here by adding a stem, just cut a wavy line from cardstock, and some leaves. For my leaves, I used SU's large oval punch and an embossing tool for the veins. I sort of pinched the ends to give the leaves more dimension. I used a white paper lunch sack for the bag, covered it with turquoise cardstock and punched a handle using SU's Key Tag punch. Super easy and lots of fun? I think so!

As always, I would LOVE to hear what you think! I hope y'all have a Stamptacular Day and a Springy weekend!

Monday, May 11, 2009

Good Monday Morning!! My First Tutorial!

Yes, I know it's Monday and I am late in showing you the card I made for Mother's Day. Sorry about that! But my mother didn't get her card until today. I'm so embarrassed that I didn't get it mailed in time for her to have it on Mother's Day. *hangs head in shame* Well, at least now she has it and I am very happy about that. So here it is! What's that? You say that I usually go on and on before showing you my card? Oh, sorry... hmmm, what can I talk about to prolong the suspense? Well, my Mother's Day was nice for the most part. DH took me out to eat (3 kids in tow) to Outback for supper last night. We drove almost an hour to get there (yes, we live in the middle of nowhere) and then we had to wait for 1 hour and 20 minutes before we were seated!! It was crazy busy! And we even got there before 6 pm, so I thought we'd have a 30 minute wait at the most. I was very proud of the kids, though, because they behaved well. Once we sat down we ordered a yummy....I'm sorry, what did you say?... oh! now you *want* me to get on with it and show you the card?? Ok, Ok, geesh there's just no pleasing some people. JK! You know I love y'all!

Here it is!! This is the card all closed up.


And here's what it looks like opened up!! Isn't it cool??


I got the basic layout from This Card over on SplitcoastStampers. Isn't this such a great idea?!

What a neat way to showcase some great DSPs! In fact, Stampin' Up! is having a sale on Double Sided Papers, as well as Textured Cardstock, this month! When you buy 3 packages of DSP or Textured CS, you get one for FREE!!! You can mix and match and there is no limit to the number of packages you can get for Free! If you are interested in seeing more, just click HERE and visit my Stampin' Up! website. You can click on the Shop Now button at the top of the homepage and shop 24/7. Don't miss out on this fantastic deal!

After I made this card, I realized that it was too big to fit in a standard card envelope. So in the future I would modify the measurements to create a bit of a smaller card. As it is, it worked out for me. Because I was mailing the card to my mother, I wanted to use some padding around my card to make sure it didn't get crushed in the process of mailing. So I used a larger envelope and wrapped the card in some thin bubble wrap. (I love that stuff! I had such a hard time not popping the bubbles before I sent it off in the mail!! lol)

You can find some basic instructions under the comments on the card in the link. However, I have made up some that are a little more detailed, just in case any of you are like me and you need more instruction. Woo Hoo, my first official tutorial! Bear with me. :)

You will start with a piece of cardstock that is 6" x 12". Here I used a textured cardstock in Certainly Celery, but in the card above I used Kiwi Kiss Textured Cardstock.

Using the scoring blade, score at 2", 4", 8" and 10".

(in my pictures you will see an extra score line in the middle. Just ignore that, I got a little score happy!!)

Replace the score blade with the cutting blade. Turn the cardstock and place the left edge on the 1 1/2 " mark (on the silver part of the base). Now put arrow of the orange blade thingy at the 2" mark on the plastic ruler guide and cut the cardstock from the 2" mark down to the 10" mark. The pictures are blurry, but I hope you can see what I mean.


Now repeat this step for the other long side. And you should have a piece that looks something like this:

Now you are ready for the folding. First, fold the far left panel to the back and the far tight panel to the front.

Next you will work with your 4" set of score lines. (we are working left to right, and you have already folded the 2" and the 10"lines) Fold the top and bottom score lines in valley folds and the larger middle line in a mountain fold. Then move onto the 8" score lines and fold them in the opposite direction. ie, fold the top and bottom lines in mountain folds and the larger middle line in a valley fold. After you have folded them all you should have something that looks like this:

Now you are ready to carefully fold it all together and really crease the score lines. When you have it nice and creased you are ready to decorate.

And just because I love y'all so much, I am even going to give you the dimensions of the panels that I made to decorate the card. (I did vary from this a little for my middle 3 panels)
The Left and Right Vertical Panels are 1 1/2 x 5 1/2 and 1 x 5 layered.
The 4 small rectangles are 1 x 1 1/2
The 2 long rectangles are 1 x 3 1/2
The Left and Right Middle Panels are 2 1/2 x 3 and 2 1/4 x 2 3/4 layered
The Middle Panel is 2 1/2 x 3 1/2 and 2 1/4 x 3 1/4 layered

I used the Bella Toile DSP and Rose Red, Chocolate Chip, Whisper White Cardstock, and the Kiwi Kiss Textured Cardstock. Heartfelt Thanks and All Holidays Stamp Sets. Chocolate Chip, Rose Red and Kiwi Kiss Ink. The Bigshot with the Birds and Blooms dies for the flowers. Hodgepodge Hardware for the silver brads and slide. White Satin and Chocolate Grosgrain Ribbons.


Well, that's it for today's post. I hope you like the tutorial. I would love to hear what you think! Thanks for stopping by and have a Stamptacular Day!!

Friday, May 8, 2009

TGIF!

I'm so glad it's Friday! I am looking forward to the weekend. Especially Mother's Day.

So I am just popping in to let you know that I am almost ready to release my "Card Kit by Mail." I just have a few little loose ends to tie up. The basic idea is that you can purchase this kit from me and you will get all of the cardstock, ribbons, accessories and so forth that you will need to make 12 different cards. (Envelopes are also included in the kit.) You will need just a few items at home to complete these cards - like adhesive, paper trimmer, a stamp set and ink. You will also get detailed instructions with pictures that walk you through the assembly process. It's super easy and you can work at your own pace. So be on the lookout for more information about this great kit!


Also, I will be back on Sunday to post pictures of the Mother's Day card I made for my Mama. I am really excited about how it turned out and I am anxious to share it with you. BUT I don't want her to see it before she gets it in the mail! And she should have it by Saturday (at least I hope so!! I'll be embarrassed if it is late...) so I can post it on Sunday for all the world to see. Or at least this little corner of the world. :)


For now, have a Stamptacular Day!

Monday, May 4, 2009

Another Monday, Another Week of Fun!!

This week is going to be a crazy one for my family and me. We have soccer, band, Church, choir, Scouts, and more. I have been asked to bake a cake for a friend's graduation party and it's a pretty big one. So I'll be working furiously on that this week. In addition to all of the regular family stuff, and now a fairly involved cake, I have also signed up for a swap. AND, as if that wasn't enough, I am also signed on as a Secret Sister. So I will be working away on cards in between the baking and the shuttling around of children. Don't get me wrong, I am very excited about (almost) all of it. I am just a little worried about how I will fit it all in. Thankfully, my DH will be around in the evenings to help with the kids. It's hard to get a whole lot done with a toddler under foot during the day, so my most productive work hours are after all the kids are in bed. I will probably be awake at odd hours for the next 3 days. It reminds me of college when I stayed up to study (hahaha). Actually I was an Art major and I did find that I am more creative at 1:00 or 2:00 AM. I'm not sure why that is, but now that I have kids, it seems to be a blessing.

Today is Monday... so you know what that means! Yep, it's Mojo Monday Time! I did take some time this morning to make a card for the Mojo Monday week 85 sketch. I have to admit though, my mojo took a while to wake up this morning. I couldn't wait until tonight to work on it though because I'll be up to my elbows in cake batter. yummy!!! When I first saw the sketch, I thought it looked fairly straight forward. Then I started trying to decide on a stamp set and patterned paper that I wanted to use. I'm not sure why, but sometimes that is the hardest part for me. I picked a set and then went to look for DSP. I'd see some paper that I wanted to use, but then I'd think the stamp set would need to be different. I'd pick out another set and go back to the paper, only to rethink my paper choice and start all over again. This went on for quite sometime. BUT I finally decided and got to work. I got the background papers done and the sentiment stamped and matted. Then I chose the ribbon. And then a WALL! I couldn't decide on the vertical mat and the embellishments. I think at one point I had out just about every punch, button, brad, etc that I own. I know I made at least 3 different embellishments to go on the vertical mat. I knew I wanted something, but nothing was really jumping out at me. After much debate and a Diet Dr. Pepper (again, yummy!) I came up with the final product. And so...drum roll please.... aww, come on, I said please! ...drum roll please!(thank you)... here it is:


It's a bit more than I usually do on a card, but I am pretty happy with it. I have found myself being drawn to cards with lots and lots of layers lately. (Say that 5 times fast!) Oh, and because I wanted to fit so much on here, this card is a 5x5" square base.

Here's a picture of the side. I was trying to show how layered it is, since it's hard to really tell in the last picture. Plus you can peek at the inside, which is also decorated. I keep telling you how happy it makes me to finish the inside of the card. I don't do it every time, but I Never regret doing it!


Stuff I used: SU only, Stamps: All Holidays Paper: Washington Apple DSP, Riding Hood Red, Whisper White, Bashful Blue textured and smooth, So Saffron, Pumpkin Pie Ink: Bashful Blue, Pumpkin Pie and So Saffron Markers, White Gel Pen Other: Button Bouquet, Button Latte, Pumpkin Pie Striped Grosgrain Ribbon, 5/16 Brad, lots and lots of popdots, and punches: 1 1/4 circle, 1 circle, 3/4 circle, scallop circle, scallop edge.

That's it for me today. I'm off to the store to buy cake ingredients and lots of Dt. Dr. Pepper! Thanks for stopping by. I'd love to hear your comments! I hope you have a Stamptacular Day!

Saturday, May 2, 2009

It's Gifts for Girls!

My daughter has been invited to a couple of birthday parties lately. There's a store in town that has a back room that they rent out for girl parties. The walls are all painted with murals of flowers and castles and princesses, oh my! They have a little stage where the girls can have a fashion show or sing karaoke. And then there are the dress up clothes. All kinds of fun clothes for the girls to put on. Plus they get to have their hair and makeup done. There is a lot of glitter involved. I personally am not a girly girl, but my daughter sure is. She has loved these parties!

Anyway, for two weeks in a row, I needed a gift for a young girl that I don't know. So what do I turn to... Paper Crafting of course! I made a set of gifts for each girl and a box to match. I really have had a lot of fun doing these. The second set (I just made these last night) are some of my favorite cards I've made. Yes, I am patting myself on the back! lol! I can't help it. I love these cards. Now, the only thing about these gifts is that I am using retired Double Sided Papers and Simply Scrappin' Kits. You see, I am a hoarder. I hoard. Especially patterned papers. They speak to me and I must have them. But then I don't want to use them up, so I save them. A lot of them! Lately I have been running out of space and so I decided this would be a great chance to use up some of my old papers.

So do you want to see what I made?? Well, OK, I *guess* I'll show you. *wink, wink*
(I kept the pictures a bit small since I have so many to post today.)

Here's the first set. It was for a girl named Heather.
First I made a little picture frame:
Then I made a matching notepad:

And finally I made a set of notecards with envelopes:

But of course all these cute gifts needed an equally cute box to hold them:

The belly band holds the box closed.


And here's the second set. This one is for a girl named Addy. I made a notebook, a set of cards with envelopes and a box to hold it all.


Well now I have to get ready to take my daughter to the party. And I am having issues with the layout of this post (as if you couldn't tell that already! lol). Those of you who know me, know that I am really technologically challenged. Paper crafts I can do, but this whole blogging this is a challenge for me. So I will come back later today and give more details on these projects. For now...as always, I would love to hear what you think and Have a Stamptacular Day!!